![]()
Night vision devices are powerful tools that allow us to see in the dark. Telescopes and binoculars require reflected or emanating light, and become useless in the absence of light. Night vision devices can enhance your view using different methods to amplify and display an image from very little available light. Most people would think that they are tools used only by soldiers on the battlefield, however, night vision is widely used in search and rescue, observing wildlife, navigation, security, and more.
If you’re still reading, chances are, you’re curious about the inner workings of a night vision device. Or maybe, you’re planning to buy one for your own use. Regardless of your reason, stick around and we will brief you on what you need to know about night vision scopes.
TYPES OF NIGHT VISION DEVICES
When it comes to night vision devices, they can be categorized into two distinct categories based on the technology they employ. They are image intensifiers and thermal imaging. Each has the ability to provide vision in the dark with varying degrees of effectiveness depending on the situation.
Image Intensifier Night Vision
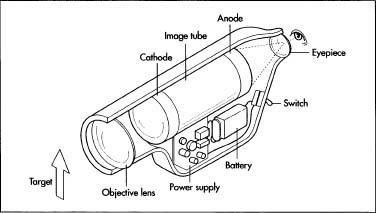
Image intensifiers provide vision in the dark by boosting a dim environment with the help of an image intensifier tube in the following steps:
1. When used in a dark environment, surrounding ambient light will enter the objective lens of the night vision device (NVDs) and be sent to the image intensifier tube.
2. The image intensifier tube will then receive high voltage output from the power supply.
3. As the light passes through the image intensifier tube, they are converted into electrons with the help of a photocathode.
4. The electrons formed will then be multiplied by a microchannel plate (MCP).
5. As the electrons leave the MCP, they will enter the phosphor (while maintaining their position) to create photons.
6. The photons then form an “intensified” image that is viewable through the eyepiece.

When it comes to pitch black environments, image intensifiers will not work. That is why some come equipped with a built-in IR illuminator that projects near invisible infrared light that can be seen through the image intensifier. These image intensifier devices produce a green monochrome image, and are highly sensitive to light. They can easily be damaged if used in daylight or artificial light. The objective lens of these should always be covered when not in use to prevent accidental light exposure.
Digital Image Night Vision
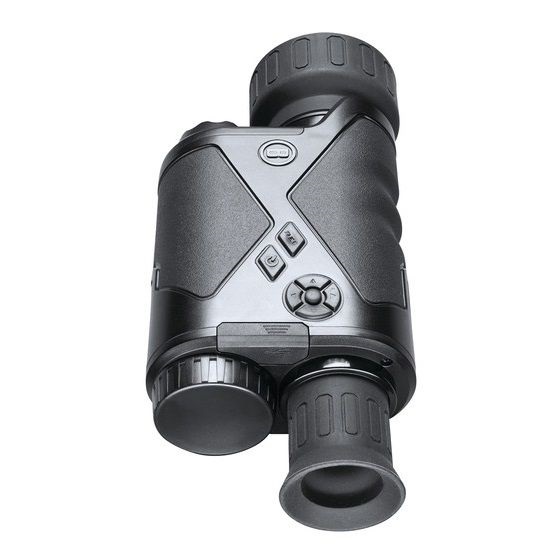
Similar to a digital camera, these devices use image sensors, but ones that are highly sensitive to wavelengths of near infrared light (typically from 750nm to 1000nm). Light entering the device is focused onto the image sensor and converted into pixels. The pixels are processed and enhanced to produce a grayscale image that is rendered on a screen in the eyepiece. Digital image night vision devices can be used in daylight without risk of damage, but require sufficient infrared light to function effectively in the dark. These devices typically come with a built-in infrared torch for additional illumination if required. One of the best-selling digital night vision devices is the Bushnell Equinox Z2 6x50 Night Vision Monocular.

Thermal Imaging Scopes
Thermal imaging works by capturing a higher spectrum of emitted infrared light using an infrared scanner, explained in the following steps:
1. Infrared energy radiated by an object will be received optically, and focused onto a thermal sensor.
2. Information received by the sensor is processed and enhanced using a complex algorithm.
3. The final image is rendered for display.

Thermal sensors are sensitive to middle and far wavelengths of infrared (typically between 1700nm and 5000nm). This range of infrared is completely invisible, and can penetrate thin foliage. When selecting a thermal imaging product, some critical specifications that need to be considered are:
NETD (Noise Equivalent Temperature Difference)
NETD is a measure of sensitivity to temperature change. For a night vision, it’s always better to have a lower NETD.
Resolution
Higher is always better when it comes to resolution. A high-end thermal imaging scope can provide a resolution of up to 640x480.
Temperature Range
A bigger temperature range allows for more details to be captured by the scope for display.
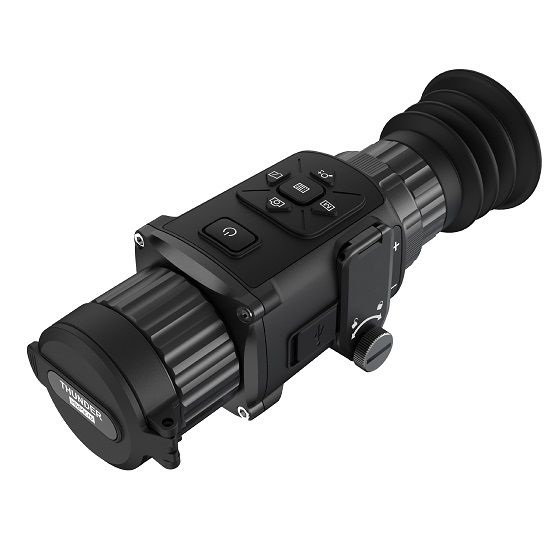
Another factor that should be considered before purchasing a thermal imaging scope is the additional functionality that comes with it. For example, the HikMicro Thunder35PC Thermal Imaging Scope can be used in three different configurations (thermal sight, handheld thermal monocular, and thermal day-sight clip-on) to better suit your needs.

GENERATION OF NIGHT VISION
Over the years, many improvements have been made to the night vision technology. These changes are classified by generation (GEN)
Generation-0 (GEN 0)
The earliest generation of NVDs were used in World War II and the Korean War, and were manufactured by the United States Army.
In this generation, the NVDs were equipped with an IR illuminator that projects infrared light to reflect off the surface of an object before bouncing back to the NVD. Issues in this generation include a lower lifespan of the tube inside due to the electron acceleration and image distortion. This technology was easily duplicated by enemy forces, aiding them to see in the dark using the infrared light projected from other NVDs.
Generation-1 (GEN 1)
The next generation is also known as “Starlight” since it uses the ambient light from the stars and moon to reflect the surrounding infrared light into the NVDs. This method is dubbed as passive infrared.
Because of this, GEN 1 NVDs do not require an IR illuminator. However, this reduces their effectiveness in pitch black or foggy environments. GEN 1 devices still used the same image intensifier technology as GEN 0, so image distortion and short lifespan was still an issue.
Generation-2 (GEN 2)
In GEN 2, a huge improvement was made through the introduction of a microchannel plate (MCP). Instead of just accelerating the electron in the tube, the MCP will multiply the number of electrons as well.
With the addition of the MCP, the resolution and sensitivity of GEN 2 NVDs had significantly increased. This allowed the GEN 2 models to operate in extremely low light conditions, far more reliably.
Generation-3 (GEN 3)
This generation is still being used by the U.S Military. No major changes were made since GEN 2, other than adding gallium arsenide for more efficient conversion of photons to electrons, and an ion barrier coating to the MCP that extends the life of the tube. Because of these new additions, NVDs in this generation have better sensitivity, resolution, and durability.
Generation-4 (GEN 3+)
GEN 3+ introduces the “gated” and “filmless” tubes (autogated). In this generation, they have circumvented the ion layer from GEN 3, reducing background noise and contributing to faster electron amplification for less distortion and brighter images.
Another big change in GEN3+ is the addition of an automatic gated power supply system. This allows the power supply to turn on and off rapidly to adapt to changes in lighting conditions in an instant without any halting effects that can slow down the user.
Why Are Generations Important?
GEN 0 and GEN 1 NVDs are usually cheaper and not suitable for professional use. They are good if you’re on a budget and know that these models have limited capability in terms of performance. All the generations after GEN 1 are typically more expensive. Some might even come with an IR illuminator for better illumination in extremely dark environments.g-range shooters prefer using a scope with the first focal plane.
